
Intermediate · Barre Chords
Barre chords are an important step toward intermediate guitar playing.
Unlike open chords, they use one finger—usually the index—to press several strings at one fret. The resulting shape can move anywhere on the neck.
Two essential shape families let you play major and minor chords in many keys.
1. What Is a Barre?
A barre happens when one finger presses two or more strings at the same fret.
In a full barre chord, the index finger may press five or six strings.
The index finger acts like a movable nut, creating a new starting point for the strings.
Move an open E major shape up one fret and barre fret 1; it becomes F major.
2. Why Barre Chords Feel Difficult
Barre chords require the index finger, other fingers, thumb, and wrist to work together. Buzzing and muted notes are normal at first.
Clean sound depends more on position than maximum pressure.
3. The E-Shape Family
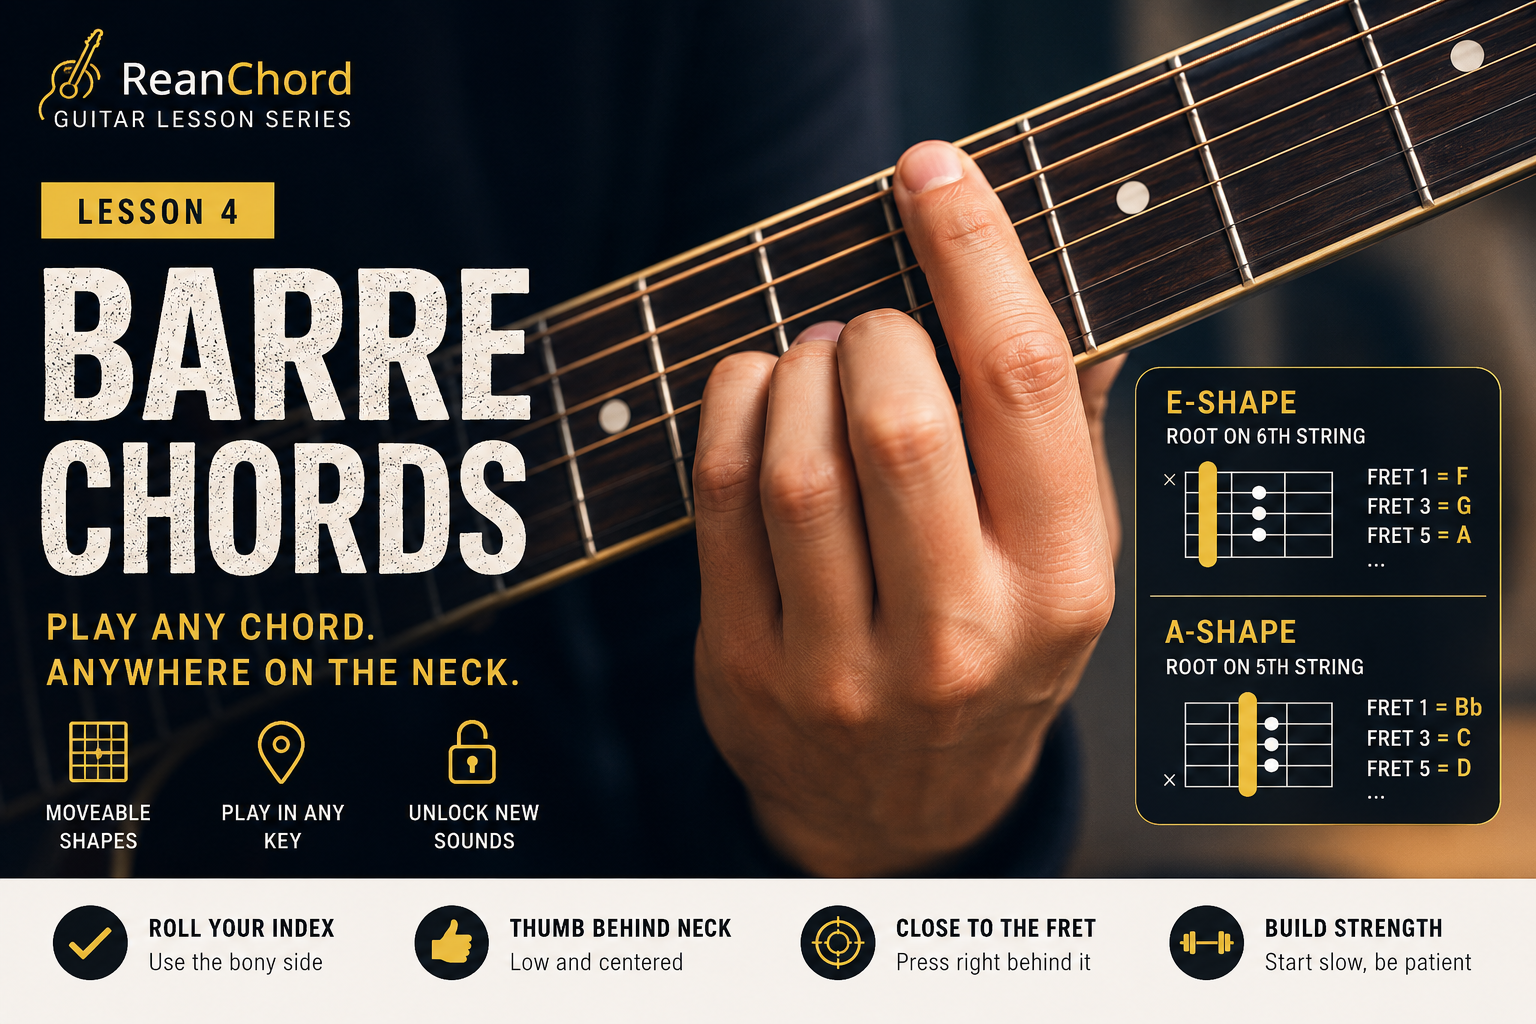
The E-shape family is based on the open E chord.
Its root note is on the 6th string, the thick low E string.
E-Shape Major Chords
F major = barre at fret 1
G major = barre at fret 3
A major = barre at fret 5
B major = barre at fret 7
C major = barre at fret 8
The 6th-string note under the index finger names the chord: fret 1 is F, fret 3 is G, and fret 5 is A.
Building F Major
F major
1 3 3 2 1 1
- Barre all six strings at fret 1.
- Place finger 3 on the 5th string, fret 3.
- Place finger 4 on the 4th string, fret 3.
- Place finger 2 on the 3rd string, fret 2.
- Strum all six strings.
Move the same shape to fret 3 for G major or fret 5 for A major.
4. E-Shape Minor Chords
The E-shape minor family is based on open Em.
To change an E-shape major chord into minor, remove the middle finger.
F minor = 1 3 3 1 1 1
G minor = 3 5 5 3 3 3
A minor = 5 7 7 5 5 5
The root remains on the 6th string.
5. The A-Shape Family
The A-shape family is based on the open A chord.
Its root note is on the 5th string. The 6th string is normally not played.
A-Shape Major Chords
Bb major = barre at fret 1
C major  = barre at fret 3
D major  = barre at fret 5
E major  = barre at fret 7
F major  = barre at fret 8
The 5th-string note under the index finger names the chord. A C major A-shape chord is:
x 3 5 5 5 3
The x means the 6th string should not be played.
You may use fingers 2, 3, and 4 separately, or use the ring finger as a small barre across the middle strings.
6. A-Shape Minor Chords
The A-shape minor family is based on open Am.
Bb minor = x 1 3 3 2 1
C minor  = x 3 5 5 4 3
D minor  = x 5 7 7 6 5
The root remains on the 5th string.
7. Finding Root Notes
Memorize the natural notes on the 6th and 5th strings.
6th String
Open E
Fret 1 F
Fret 3 G
Fret 5 A
Fret 7 B
Fret 8 C
Fret 10 D
Fret 12 E
5th String
Open A
Fret 1 Bb
Fret 3 C
Fret 5 D
Fret 7 E
Fret 8 F
Fret 10 G
Fret 12 A
The 12th fret repeats the open-string note one octave higher.
8. Getting a Clean Barre
Roll the Index Finger
Do not press only with the soft center of the finger.
Roll the index finger slightly toward its thumb-side edge. The bony side is firmer and often presses the strings more effectively.
Stay Close to the Fret
Place the index finger close behind the fret wire.
Do not place it directly on the metal fret or too far back.
Position the Thumb
Place the thumb low and near the center of the back of the neck.
The thumb and index finger should create balanced support.
Keep the Wrist Comfortable
Allow the wrist to move slightly forward so the fingers can reach.
Do not force an extreme angle. Stop if you feel sharp pain.
Use Only Necessary Pressure
Press enough to make the strings ring, but do not squeeze with maximum force.
Too much tension causes fatigue and slows chord changes.
9. Test Every String
After forming the chord, pick every string separately.
Listen for:
- Clear notes
- Buzzing
- Muted strings
- Strings touched by another finger
If one string buzzes:
- Move closer to the fret
- Roll the index finger slightly
- Raise any fingertip touching a nearby string
- Move the thumb lower
- Relax and rebuild the chord
Do not automatically squeeze harder.
10. Start with Mini-Barres
A mini-barre presses only two or three strings.
This is a useful way to build control before attempting a full barre.
Exercise
- Barre the 1st and 2nd strings at fret 5.
- Pick both strings separately.
- Add the 3rd string.
- Move the mini-barre to another fret.
- Add more strings only after the smaller barre sounds clean.
11. Practice Higher on the Neck
The first fret is often the hardest place to learn because the strings feel tighter near the nut.
Begin at fret 5 or fret 7.
Practice an E-shape A major chord at fret 5:
5 7 7 6 5 5
Once it sounds clean, move the shape gradually toward the first fret.
12. Adding Chord Changes
Begin with one strum per chord.
| Em | G |
Use open Em and an E-shape G barre chord at fret 3.
Then play four down-strokes:
1 2 3 4 | 1 2 3 4
Keep the strumming hand moving during the change.
A slightly imperfect chord played on time is often better than a perfect chord played late.
Later, practice:
| F | G | Am | C |
13. Why Barre Chords Matter
Barre chords allow you to:
- Play in any key
- Move one shape around the neck
- Play songs in their original key
- Create major and minor chords anywhere
- Learn seventh and suspended variations
- Choose different chord positions
- Play tighter rhythm parts
- Understand the fretboard better
In a band, combining open and higher barre chords can create a fuller sound.
14. Common Mistakes
Avoid these habits:
- Squeezing harder instead of adjusting position
- Learning only F major at the first fret
- Placing the index finger too far from the fret
- Keeping the thumb too high
- Flattening the other fingers
- Practicing through sharp pain
- Ignoring buzzing strings
- Attempting full barres before mini-barres
- Stopping the rhythm during changes
- Expecting clean chords immediately
Mild muscle fatigue is normal. Sharp pain, numbness, or joint pain is not.
15. Fifteen-Minute Practice Routine
Minutes 1–3
Practice two-string and three-string mini-barres.
Minutes 4–6
Build an E-shape major chord at fret 5 and test every string.
Minutes 7–9
Move the shape between frets 3, 5, and 7. Say each chord name aloud.
Minutes 10–12
Practice an A-shape major chord at fret 3.
Minutes 13–15
Change between one open chord and one barre chord. Begin with one strum, then use four down-strokes.
Lesson Checklist
Before moving forward, make sure you can:
- Explain what a barre is
- Use the index finger as a movable nut
- Find E-shape roots on the 6th string
- Find A-shape roots on the 5th string
- Move a major shape to different frets
- Create major and minor versions
- Play a mini-barre
- Test every string
- Keep the thumb behind the neck
- Practice without excessive tension
Final Encouragement
Barre chords take time.
Early attempts may buzz or feel tiring. Practice briefly each day, begin higher on the neck, use mini-barres, and improve one string at a time.
Once these two movable shape families become comfortable, the entire fretboard becomes more accessible.
Next Lesson
Using a Capo
Next, you will learn how a capo changes the key, keeps open-chord shapes easy, and helps you match a song to your voice.